How to Attach Legs to a Table
Whether you’re building a table from scratch, restoring old furnishings, or assembling from a kit, knowing how to attach table legs is essential. While this might seem like a straightforward task, it’s more complex than you might expect.
This guide offers instructions for many situations. You’ll know how to attach table legs to a table like a pro after reviewing these steps.
Table Base Kit
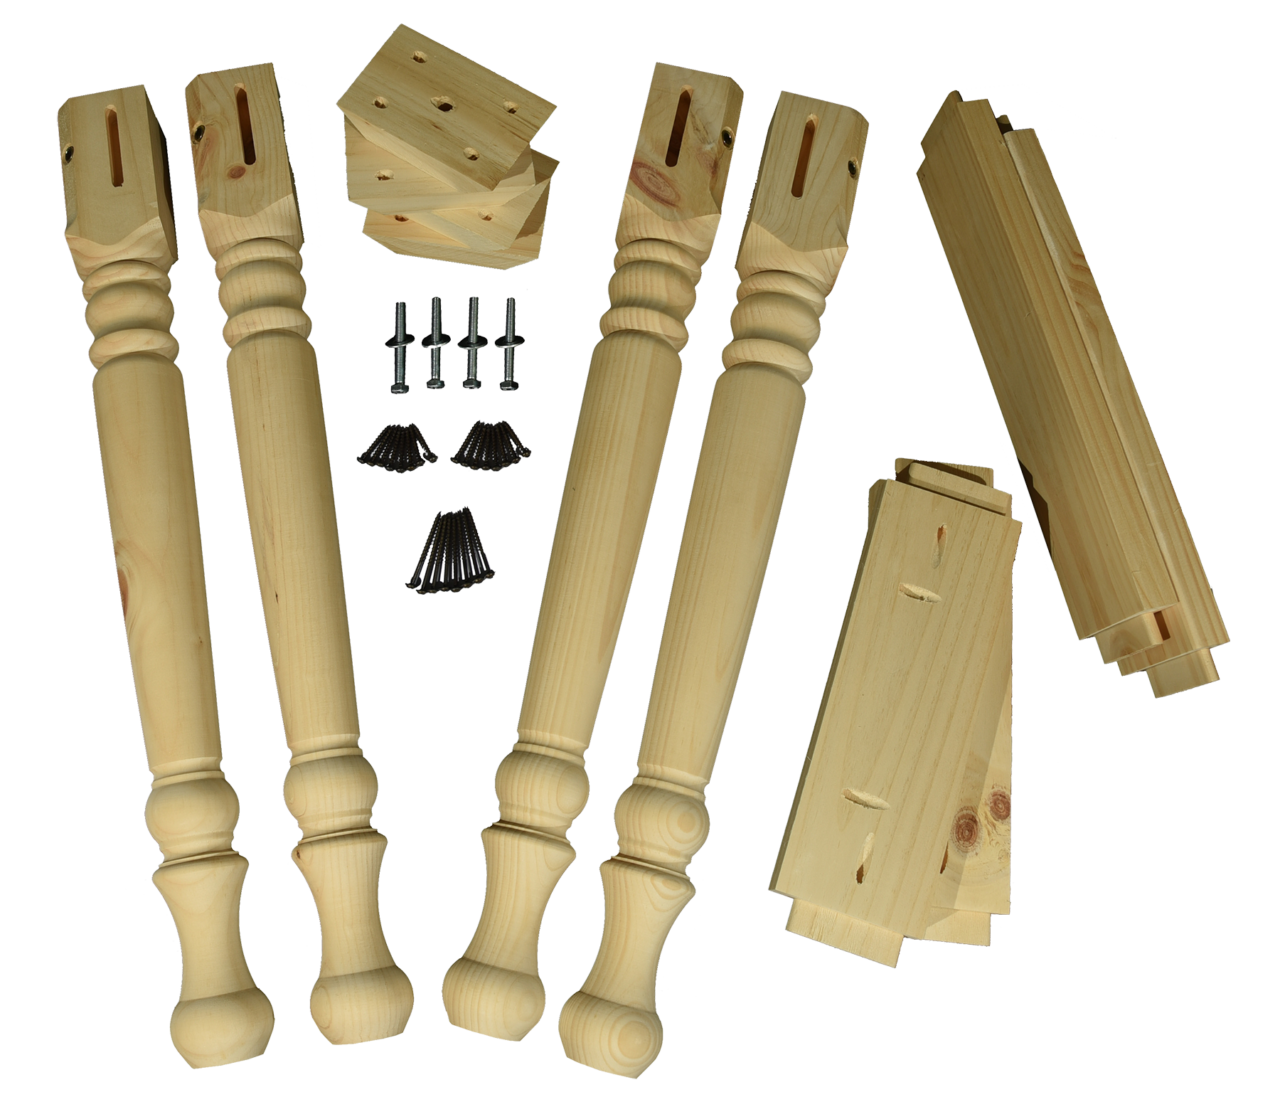
If you are not familiar with woodworking, a table base kit is a good option to consider. Using wood glue on the mortises, connect the two longest rails to the legs. Insert the provided screws into the pre-installed pockets and tighten the fittings. Follow this same method and use the short skirts to connect the long sides together.
Next, use a ½” wrench and the provided bolts to install the corner blocks. Tighten the skirt boards and corner blocks together with the supplied screws.
Holding the base upside-down, align the preinstalled pockets with the matching pockets on the table’s top. Screw the two pieces together.
Pros
Anyone who doesn't know how to attach table legs will find advantages to this type of kit. Here's a look at some of them:
Simple assembly process compared to classic tenon and mortise joinery
Offers the stability of a traditional table design without the complex assembly
Strong, stable base design created for long-lasting use
Cons
There are a few disadvantages when it comes to a table base kit, including:
Only works with designs that call for table aprons
Those with woodworking skills prefer the traditional assembly method
The assembly might loosen over time
Once assembled with glue, the base can no longer be disassembled
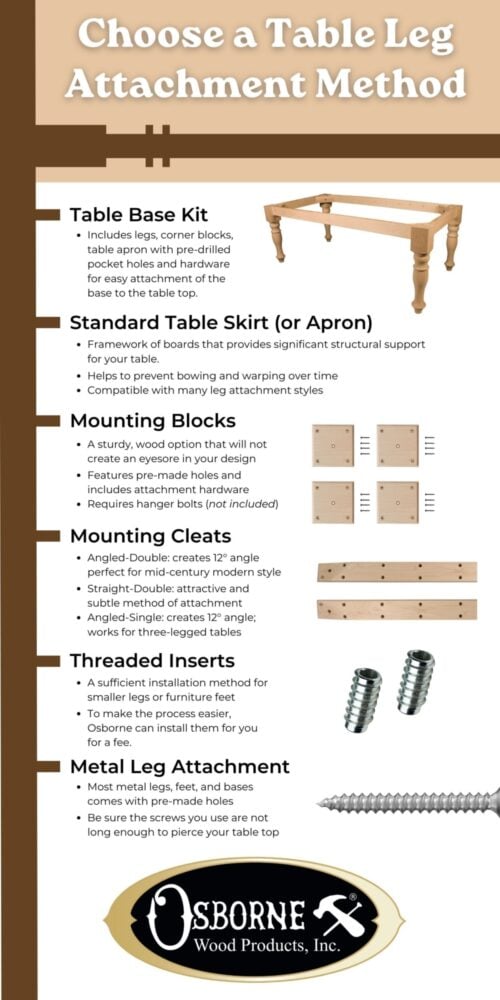
Standard Table Apron (or Skirt)
Before exploring different attachment methods, it’s important to understand the role of a standard table apron (also called a skirt).
An apron is a framework of boards running between the legs just under the tabletop, providing significant structural support. It helps prevent the tabletop from bowing or warping over time, and offers a very sturdy connection point for attaching legs.
At Osborne, we offer pre-fabricated table base kits that include aprons, but you can also create your own using dimensional lumber. This DIY approach is ideal for those who want a custom size or design without purchasing a full kit.
Even though not every method listed below requires an apron, it’s important to note that tables built with an apron are often stronger and longer-lasting than those assembled without one. In fact, many of the attachment methods in this guide can be combined with an apron for the best possible support.
Pros
Increases table stability and strength
Helps prevent tabletop warping
Provides traditional and professional aesthetics
Compatible with many leg attachment styles
Cons
Requires additional materials and woodworking skills
Adds some weight to the table
Mounting Blocks
Do you need to know how to secure legs to a table without aprons? Measure the table top for a 7” by 1” overhang and mark the wood to show where to install the mounting blocks. Each block has a center hole for the table leg’s bolt and four corner holes for the mounting screws.
Position the mounting blocks in alignment with the markings and tighten the screws in each of the four holes in the blocks. Drill a 1 ½” hole into the top center of each leg for the mounting bolt. This should leave enough room to screw the bolt into the mounting block without leaving a gap.
Align the bolt on each leg with the threaded insert in each mounting block on the underside of the table’s top. Screw the leg into place until it’s tight and straight.
Pros
A few advantages of using mounting blocks include:
Simplicity
Keeps the attachments hidden
Requires very few tools
Cons
Downsides of the mounting block method that some might find troubling include:
Nailing the blocks into place requires some skill
Softer wood might split
The bolts can loosen over time

Mounting Cleats (Single or Double)
You can use straight or angled cleats to secure the legs without using an apron. Measure positions for the cleats on the underside of the table. Keep in mind that the position you choose for the cleats will determine the overhang of the tabletop. Using a pencil, mark the edges for each cleat’s position.
The cleats come with mounting holes and the adjoining screws. Simply insert and tighten the screws into each pre-installed mounting hole. Make sure you use the provided screws since longer screws will poke through the table's top.
The next step involves installing the table legs. To begin, screw the provided mounting bolts into the holes at the top of each leg. When installing the bolts, leave 1” of threading exposed. The cleat will accommodate that inch of threading as you screw the legs into the cleats. Turn each leg until you feel resistance. The leg should look straight and feel sturdy after finishing this process.
Pros
Here are a few benefits of mounting cleats:
Unscrewing the legs for transport or storage is quick work
Assembly is easy and fast
They sufficiently support heavier loads.
Cons
Before learning how to attach table legs with mounting cleats, understanding the limitations can help:
Mounting cleats don't work on tables with metal bases
The cleat attachments stay visible
Tables wider than 40” or longer than 70” may be unstable
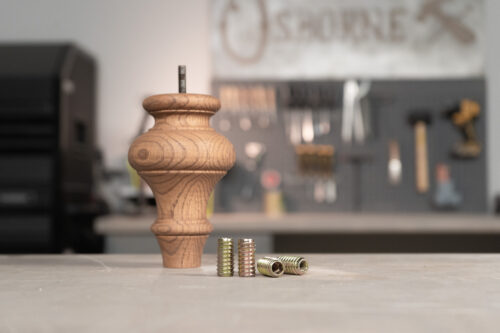
Threaded Inserts
If you're a novice and learning how to attach table legs, this method might not provide a good first-time experience. Using threaded inserts is best recommended for those who already have some woodworking skills. That's because the leg bolts don't usually come pre-installed.
To attach legs with threaded inserts, you'll need a drill to achieve the best results. To get started, you'll use the drill to create a pilot hole in the table's underside. You'll install the threaded insert in this hole. Usually, the inserts are ¼” in length with a ½” diameter. Drill the hole accordingly.
Next, you'll drill a hole in the top of the table leg. Make sure to measure the length of the bolt ahead of time. Mark the hole depth on the table leg with a pencil. This is necessary because you'll leave ¾ of the bolt's threads exposed once you have fully screwed the bolt into the top of the leg.
Now, you're ready to connect the leg and the table. Screw the leg's bolt into the threaded insert on the table. Keep rotating the leg until you feel resistance. Tighten the leg a little more to ensure a stable connection.
As long as you don't use adhesive, you can remove and reattach the leg as needed. Follow this same process with the remaining legs.
Pros
Even though this method requires a little more skill, the results provide a few benefits. Here's a look at the best reasons to use this method:
Since the legs screw directly to the table, the attachments provide better stability
The threaded insert and bolt remain unseen, so all of the hardware stays hidden
You won’t have to install an apron on the table
Cons
In addition to requiring some woodworking skills, there are a few more drawbacks to this method. Familiarize yourself with these issues to determine whether this is the best method for you:
If you make a drilling mistake, you may not be able to finish the project
This method won't work on tables with metal bases or aprons
Threaded inserts aren't recommended for use on larger tables

Direct Attachments (for Metal Legs)
This might be the easiest type of table to assemble. You won't have to know how to attach table legs to any other kind of table. Since this type of table usually comes with everything you need, you won't need special skills or tools. A basic screwdriver set is all that’s required.
When you're ready to get started, gather the metal leg and enough of the provided screws for each hole. Simply press the leg against a table corner and align the holes. Using your screwdriver, rotate the screws until they feel tight. Do this for each screw before moving to the next leg.
Pros
There are plenty of reasons to choose this type of table. Here's a look at the advantages of fastening table legs with direct attachment:
It offers an easy and fast installation
You can easily remove the legs for storage or moving
A wide range of options makes it easy to fit this type of table into any budget
Cons
In spite of the easy assembly, there are a few reasons to rethink this option. Here's what to consider:
The stability varies based on the quality of the metal
There's a limited variety of styles with these tables
The screws can loosen over time, compromising the table’s load-bearing ability
Shop Our Table Legs and Attachments
After 40 years in the industry, Osborne Wood has established a strong reputation among builders, homeowners, and architects. We provide the corbels, mouldings, millwork, and more pieces you need to finish any project. Speak with a product specialist when you contact us today!


