Assembling the Industrial Table
Thank you for choosing Osborne for your table project. Please contact us if you have any issues with your build!

In this box:
- Table top
- Trestle base
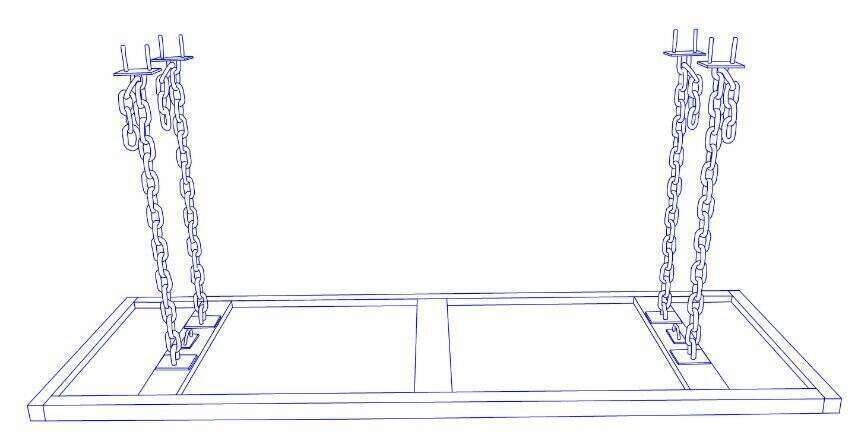
- (4) Chain link table legs
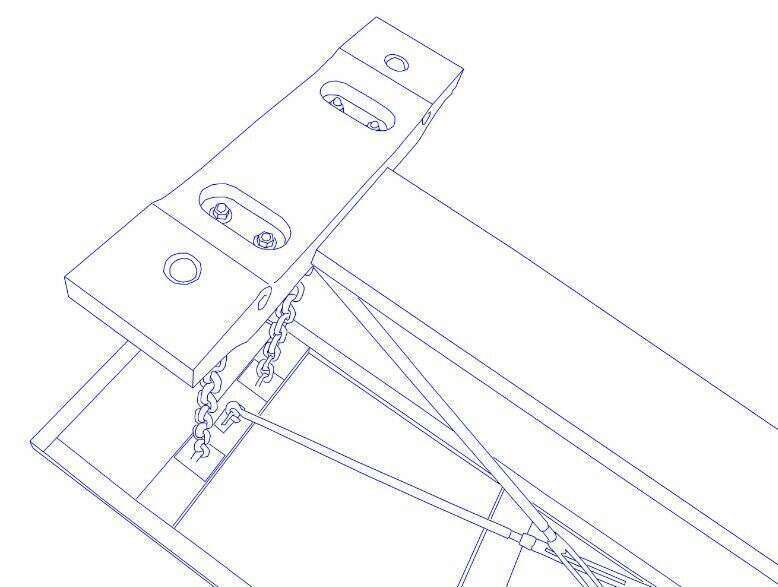
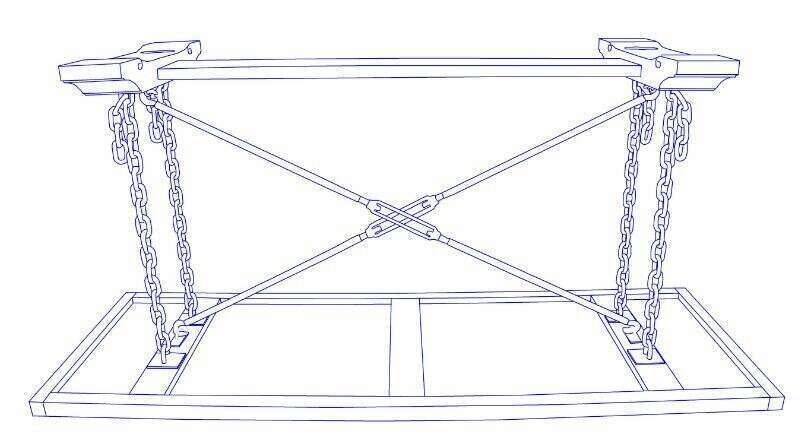
- (2) hooked turn buckles
- (8) small washers, (8) small lock washers, (8) bolts, (8) large washers, (8) large lock washers, (8) nuts
- Right angle screw driver
- Mini wrench
 |  |  |
Lay out kit components
Place all of your materials out to make sure everything is there and to get organized. Divide your hardware into two groups:
Group 1 - Small washers, small lock washers, and bolts
Group 2 - Large washers, large lock washers, and nuts
Place the table top upside down
Place the top of the table face down on the ground. Decide where you want to place the legs (there are several spaced out pre-drilled hole sets).
Attach the legs
Line up the holes on the table top with the holes on the flat side of the leg. With hardware Group 1, assemble them as bolt, small lock washer, then small washer on top. Put each bolt assembly in the predrilled holes and tighten them until they are “finger tight”.
Start working on the trestle
Get the bottom trestle and flip it upside down. Fit the pre-drilled holes in the trestle over the bolts at the bottom of the legs. Use the Hardware Group Two for each of the bolts at the bottom of the legs. Put the large washer on first, then the large lock washer, finish with the nut and then tighten until it is “finger tight”.
Tighten the bolts and nuts
Take the right-angle screwdriver tool and tighten down each of the bolts connecting the legs to the table top. Use the wrench to tighten each of the nuts connecting the legs to the trestle.
Hook the buckles
Take the first turn buckle and hook it to one of the metal hooks underneath the table top. Loosen the turn buckle in the middle to adjust the length of the bar enough to also fit over the metal hook on the diagonal and opposite side of the trestle base. Tighten the turnbuckle by twisting until the bar fits snugly.
Repeat previous step
Repeat this process with the second turnbuckle, so that they cross like an ‘X’. Carefully flip the table over and you have completed the Industrial Table build!
