Osborne Builder's Studio: American Flag Coffee Table
This special episode of the Builder's Studio demonstrates how to build a stunning American Flag coffee table! Featuring some of our popular products, you can easily use this build as inspiration for your next DIY project.
Products used in this build:
- Rustic Plank Table Kit (Part #5910)
- Custom Table Base Kit
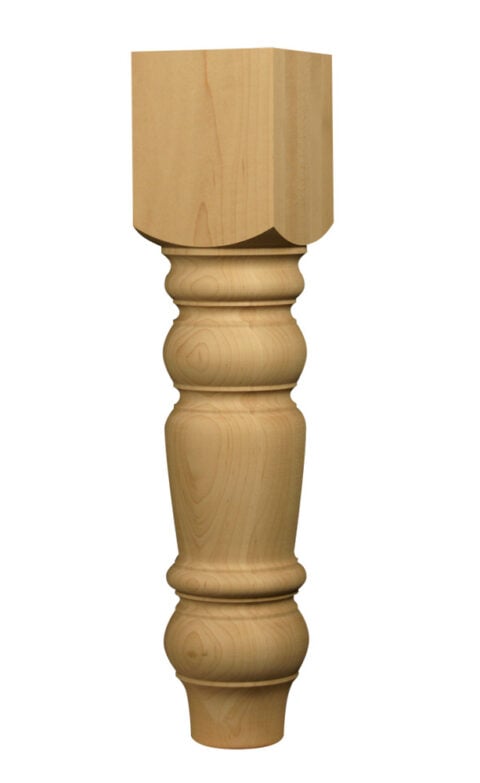
- Husky Country Coffee Table Leg (Part #1339)
- Set of Four Corner Blocks (Part #310300)
Assembly Instructions
Overall Dimensions: 46” x 25” x 19”
What we used:
| • Rustic Plank Table Kit (Part #5910) | • Custom Table Base Kit |
| • Husky Coffee Table Leg (Part #1339) | • Set of Four Corner Blocks (Part #310300) |
Other items needed:
| • Dark Stain Color | • Drill | • Red Stain Color | • Light Blue Stain Color |
| • Painter’s tape | • Sander (optional) | • Paint for Stars (optional) | • Star Cut Outs (optional) |
Instructions:
Assemble table base kit
Start by assembling your table base kit by attaching your legs and structure together using the hardware and pocket holes supplied. Also install the four corner blocks to ensure stability by drilling them into each corner of the table apron using screws and the predrilled holes. For more in-depth instructions on this step, see here.
Assemble plank table top
Once you have built your table base, it is now time to assemble the plank table top. There are pocket holes and dowel holes already pre-drilled. Required hardware and wooden dowels needed for the assembly are included. Connect the planks by putting wood glue into the side dowel holes and place the dowels inside. After all the planks are placed together, drill screws into the pocket holes on the underside of each plank. For more in-depth instructions on this step, see here.
Sand the items
Now that both elements are assembled, leave them apart for now to prepare for staining. This is a good time to sand your project (if desired) before applying stain for a more even staining process.
Finalize flag design and let dry
For the American flag look, apply a darker stain to the table base and sit to dry. To create a flag pattern on the table top, use painter’s tape to create the stripes. Apply red stain to every other line to create the red and white alternating stripes. The ones with tape will appear white since they will remain unstained. Allow the stain to dry.
Add details & let dry
Tape off a rectangular area in the top left corner and apply a blue stain. You may apply the stars in any way that is most convenient for you whether that be painting or using a cut out (we used star cutouts and applied stain overtop of them).
Attach table top & base
Lastly, after all stain colors have dried, you can attach the top to the table base by laying the build face down on a surface and drilling screws into the pocket holes.